Chocolate cupcake

20140416-213226.jpg

It’s been a long busy week. I have been yearning for a cake for the longest time ever. Cheesecake, chocolate cake, muffin, etc. anything. Somehow all the other sweet treats I had just didn’t quite hit the spot .

So I decided to make choc cuppies with the girls after school today. Compared to what is on offer at the shops with gorgeous swirls of frosting (I am not a big fan of frosting though) and fancy packaging, this simple cupcake is …… well, simple. Humble. No fancy schmancy name to boot.

I couldn’t resist it when it came out of the oven. It looked so smooth and inviting. When it cooled down sufficiently, my girls and I shared one cupcake. Oh me oh my, it was good. If you are looking for complex tastes, this isn’t the one. But if you are looking for comfort food that melts in your mouth, this is it. Had it warm so that was real good. Let’s see how the flavours and texture develop overnight.

Too tired to post the recipe this round. This soul is tired and is so looking forward to the long Easter weekend. A joyous time to celebrate what The Lord has done for us. A time for us to remember His grace for He first loved us. Thank you Jesus. All glory and honour to you!

Enjoy the pic!

Penang Fried Kueh Tiao (My Style)

20140330-093802.jpg

This dish brings back fond childhood memories. My mum used to cook this on weekends more as a reprieve from cooking up a storm during the week, but for me, it was a heavenly treat for the tastebuds. Soul food if you know what I mean.

I learnt this from my mum, who learnt this from her mum, a true blue Peranakan (Straits Chinese) who hailed from Penang and wore the Kebaya every day and chewed betel nut during her spare time. I am proud of my partial Peranakan heritage (my dad is pure Chinese) and I hope to be able to pass on whatever tradition that still remains to my kids.

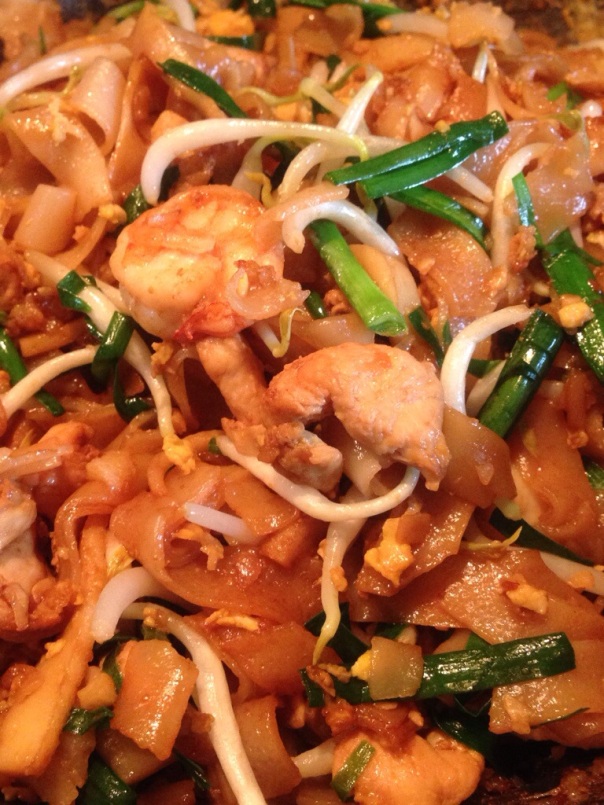
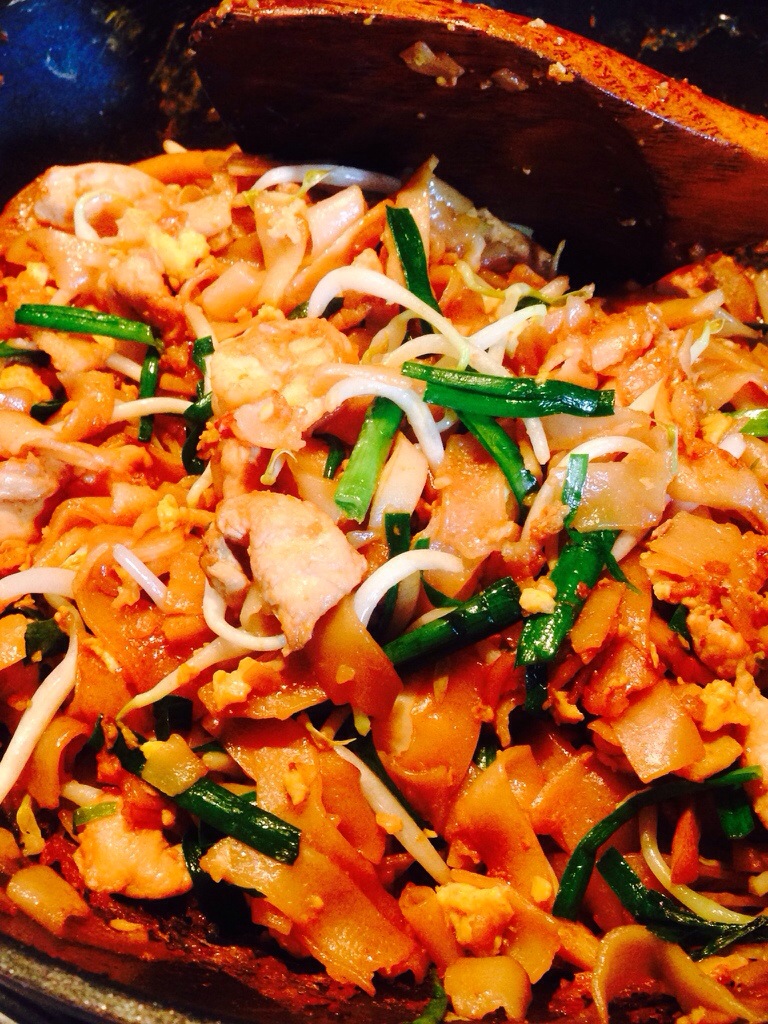
This rice noodle (kueh tiao) dish is considered peasant food as the ingredients used are cheap and easily available. There is no meat or seafood in it. An egg thrown in in the olden days was already considered luxurious. However the taste is something altogether. The wok hei (literally meaning the aroma from the wok) is key but is also something I can’t replicate 100% at home. I don’t have a large hob burner like those the hawkers use. But nonetheless, the taste doesn’t disappoint.

In order to meet the nutritional needs of my family (not to mention tiny picky tastebuds), I have added chicken slices, prawns and fishcake into this dish, just to make this a complete one dish meal. If I had it my way, I would have ditched the meats, upped the amount of minced garlic and chopped preserved turnip and added freshly pounded chilli paste to the dish.

The key to the success of this humble dish is heat control and speed. Have all your ingredients and sauces lined up within arm’s reach so that you don’t break a beat. I also cooked this in 2 batches to ensure that the flavours get through. My wok isn’t big enough. If you have a huge one (bigger than 40cm in diameter), go ahead to do this in one shot.

Ingredients
serves 4-5 pax
800g fresh kueh tiao (if using dried ones, after soaking in water, it should yield the same weight)
200g beansprouts
100g chopped preserved turnip(Chye poh, available at most asian supermarkets) you can omit this if you can’t find it
200g Chinese Chives (a key ingredient, you can substitute with spring onions but the taste will be different), chopped into 1 inch chunks
5-6 cloves of minced garlic (I like my garlic, you can reduce to 3-4 cloves if preferred)
*200g chicken breast or de-boned thigh, sliced thinly into strips marinate with light soy sauce ahead of time
*12 medium sized prawns , marinated with a little salt just before cooking
* 2 pieces of fishcake (around 100g), sliced into strips
3 medium free range eggs, beaten up
Dark soy sauce

* denotes optional items

Method
1. Heat wok up. It must be hot before you add the oil. I used extra light olive oil. Any vegetable oil will do. Pour enough to coat a thin film over the base of your wok.
2. Once heated through (not smoking), add half the garlic and half the chye poh and fry till fragrant and slightly browned.
3. Add the half the chicken and prawns if using, stirring constantly till just cooked.
4. Add half the kueh tiao and dark soy sauce. Mix well. It should coat each strand of the noodles to yield a nice brown colour, around 4 tablespoons of dark soy. Remember to stir constantly. Flame should still be medium to high.
5. Push the kueh tiao to one side of the wok. Pour half the beaten eggs into the empty side of the wok. Let it set a while longer before mixing the kueh tiao with the eggs.
6. Add half the beansprouts and Chinese chives and stir through. Turn off the heat after about 3-4 minutes. The beansprouts and chives should just about lose the raw taste but still crunchy and firm.
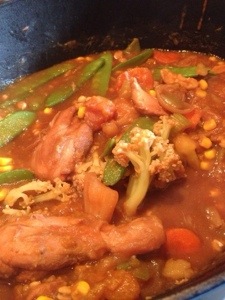
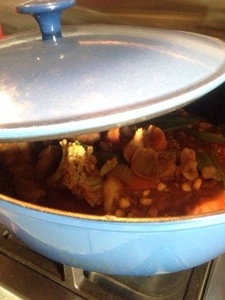
7. Dish out into a holding pot and repeat the same process with the remaining ingredients.

If you are using dried rice noodles, follow the instructions on the package. After draining out the water, add some cooking oil to the kueh tiao to prevent clumping.

Bon appétit!

20140330-093831.jpg

The Perfect Scone

It’s the term break. We had a fun filled morning of water play and the eldest got her ears pierced too.

We had to come back after lunch so that I could take a conference call. So much for a day off.

There was still some time left after my call. By now, it had started to rain heavily. So what better way to spend the afternoon than to bake.

When I first saw the way Gordon Ramsay had named this recipe, I was like, yeah right. Perfect scones. Easy for you to say. But nonetheless after reading it through, it did sound easy enough.

The girls and I couldn’t agree on the topping so we added both our favourite things – chocolate chips and dried cranberries. A very easy to follow recipe using common ingredients that many kitchens will probably have. I followed the recipe to a T except for the amount of topping. That one I went by sight 😆

The end result – a nice golden crust like a biscuit, and soft and fluffy in the inside. It really is the perfect scone. Much as Mr Ramsay had promised. This recipe is from the book Gordon Ramsay’s Secrets.

INGREDIENTS

250g self raising flour (I needed another 15g more to get a less sticky dough)
1 teaspoon baking powder
A good pinch of fine sea salt
1 tablespoon caster sugar
45g butter (note to self, use 60g next round for a more buttery taste)
1 large free range egg ( I used 2 medium eggs)
100ml of ice cold milk, and a little more for brushing
50g sultanas (I added mini choc chips and dried cranberries without bothering the measurement)

DIRECTIONS
1. Pre-heat the oven to 180c
2. Sift the flour, baking powder and salt together into a large bowl. Add the butter in little pieces and rub it using your fingers and lifting the flour up high so you aeriate it. When the butter is incorporated the mixture should look like fine breadcrumbs. Stir in the caster sugar, then the sultanas (if you are using them).
3. In another bowl, beat the egg with the milk. Pour about three quarters into the flour mixture and quickly mix together with a large table knife, adding extra egg and milk mix as necessary to give a soft, but not sticky dough. Do not overmix -the quicker and lighter the mixing and the higher your scones will rise.
4. Tip the dough onto a lightly floured surface and very gently roll with a rolling pin or pat out with your fingers to a 2-2.5cm thickness. using a 6cm cutter, press out as many rounds as you can. Gently re-shape and lightly roll the trimmings to cut out a couple of more rounds if you can.
5. Place the rounds on the lined baking sheet, brush the tops with milk and sprinkle gently with extra sugar. Bake for 20-25 minutes until risen and golden brown.
6. To check that the scones are ready, lightly squeeze the sides of one – the dough should be springy. Slide off to a wire rack and cool. Eat the scones within an hour or so of baking while still warm.

I didn’t bother rolling out the dough with a rolling pin. I just pat it down to the thickness I wanted. The girls wanted hearts and stars so we used cookie cutters for those. The balance of the dough, I just re-shaped into a round and cut wedges and squares.

20140321-085929.jpg

20140321-145258.jpg

Chicken and barley vegetable stew

It’s been a while since I last posted something. The new milestone in my eldest child’s education has me knackered and low on creative juices. And she is only at primary/elementary/grade school. What do they do with kids these days??? Sheesh.

So naturally, I crave comfort food these days. A stew, slow cooked in a heavy cast iron pot does the trick. And it really doesn’t take much brain juice to make a decent stew, one that had my kids lapping it all up and asking for more, and the adults relishing each morsel of gravy drenched steamed rice that accompanied the stew.

Recipe (enough to feed 5-6 pax)

3 chicken drumsticks and 3 thighs
1 carrot chopped into large chunks
2 medium sized onions cut into wedges
3 cloves of garlic, smashed
3-4 potatoes, cut into large chunks
Pumpkin
Celery
Handful of cauliflower
Handful of sugar snap peas or mangetout,
Half a cup of frozen corn kernels,
Half a cup of pearl barley
Water
Oyster sauce
Light soy sauce
Pepper

I browned the onions and garlic then seared the chicken. Prior to cooking, I marinated the chicken pieces with some salt and pepper. Once the chicken is a little brown, I added the hardier vegetables like the carrots and potatoes, pumpkin and barley, followed by some water and the sauces. I adjusted the sauce and water level as I went along. I left that to boil for about 10min before bringing it to simmer with the lid on for the next 30min, stirring occasionally. Just before turning off the heat, I added the corn, cauliflower and mangetout, brought it to a boil then turned off the heat. By now, the potatoes and pumpkin would have disintegrated somewhat to yield a thick gravy. If you prefer a thinner gravy, you can thin it out with some chicken stock or water. If you like to still be able to eat the potato chunks, I suggest saving half of the potatoes to be added only towards the last 15mins.

If you want something tangier, add tomato wedges at the end together with the mangetout and cauliflower. You can also add a squeeze of lemon juice.

Paired with hot steamed rice or soak up the gravy with some crusty bread….mm…mm…mmm. Food for the soul.

20140318-224624.jpg

20140318-224637.jpg

Hokkien Ngoh Hiang (fried meat roll)

Ngoh hiang is synonymous with Lunar New Year in my household. As far as I know it, my grandmother made it each new year. My mum didn’t make it but someone in the extended family who did would pass some over to us. Now that the older folks have either retired from the kitchen or have gone on to enjoy everlasting life in a much glorious kingdom, I decided I shall attempt to make this perennial favourite this year, from scratch.

I was pretty nervous about it at first. No doubt I knew the steps and main ingredients that are used, but I was wrought with trepidation that it wouldn’t turn out as I remember it. I hate it when I don’t get the taste at least 90% right on the first attempt.

During the few weeks leading to this festive season, each night I would imagine the taste of the ngoh hiang that I know and attempted to “sniff” out the”winning combination” and running through the sequence in my head. Well, guess what, I nailed the recipe on the head on my maiden attempt. Very very pleased with myself. Hubby commented that it tastes like those sold outside 😊.

As a side, whilst making those rolls, I was telling myself, what was I thinking when I decided to make this? It is a lot of work – peal, hchop, marinade, cut, wrap, steam, cool, pack, freeze till ready to eat, thaw and then pan fry before I can slice and savour it!!!!

For this recipe, I used minced lean pork, diced water chestnuts, chopped spring onions, 5 spice powder, corn flour, eggs, salt and bean curd skin for wrapping.

One batch that has been steamed, cooled, packed and ready for freezing.

20140130-230156.jpg

20140130-230205.jpg
End product after pan frying. Yumz.

20140131-103755.jpg

Gong Hey Fatt Choy

The Cantonese greeting for 恭喜发财 (gong xi fa cai). A blessed Lunar New Year to all my Chinese friends and readers.

I have been pretty much out of action the past few weeks trying to settle everyone from young to old into the routine of the new school year, especially since the eldest girl has just crossed a milestone and started primary (grade) school.

How I wished I didn’t have to wake up by 5.30am each morning. Bahumbug.

Anyway, I’m gonna enjoy this new year break. I only made 1 new dish this new year. See my next post.

20140130-233042.jpg

Butterfly cupcakes

A Blessed New Year to all. I just realised that I haven’t really posted anything in 2014.

These days, life is hectic with all 3 kids at different stages of the education ladder and requiring me to be out of bed before the break of dawn. *yawn*

Just made these sweet little cuppies for my eldest child’s good buddy who just turned 7. It is a vanilla cupcake with chocolate buttercream. I made the fondant butterflies but bought the ready made sugar paste flowers.

I wasn’t really happy with this batch of vanilla cupcakes. However, all those who ate said that it was good. Maybe it is just me being critical of my own work or those people were being very kind. But I did like the chocolate buttercream though, even though I am not a fan of frosting. I prefer my cakes naked. That is when you can taste the real thing and not have it overshadowed/masked up by frosting.

For those of you who want a simple and fairly fool proof chocolate frosting that goes with almost everything and it can withstand the tropics and humidity, here is the recipe.

Chocolate buttercream

250g unsalted butter (straight from the chiller)
250g icing sugar (chilled beforehand, sifted)
90-120g unsweetened Dutch process cocoa powder (preferably straight from the fridge too. Amount depends on individual taste. I used around 100g)
Teaspoon of vanilla extract

If you are feeling lazy, just dump everything into a mixing bowl with paddle attachment attached and whisk on low until combined before shifting to medium and eventually on high till all well combined, creamy yet fluffy. This should be enough to frost a 7 inch cake.

The long method (which is what I did) will be to cream the butter till light and fluffy, add the sugar gradually, then add the vanilla extra followed by gradually adding the cocoa powder. The whole process should take no more than 10 minutes.

You can make this ahead. 2-3 days ahead if you are keeping it in the fridge. Be sure to whisk it before use. If you are freezing it, I say it should keep for a month at least.

Play around with the proportion of sugar and cocoa powder till you get a taste you like.

20140114-211701.jpg

Baking into 2014

Whilst everyone else was counting down to 2014, I was assembling a chequered cake for my BFF’s birthday celebration on New Year’s Day.

Decided on a pandan and vanilla cake with salted caramel buttercream frosting. It turned out pretty well but not quite the level I was hoping to achieve. The pandan fragrance didn’t come through strong enough.

I squeezed out the pandan essence from pounding the pandan leaves in a pestle and mortar. I didn’t use any artificial flavour enhancer. Guess this batch of pandanus leaves are less fragrant.

Anyway, this is wishing all of you a Blessed 2014. May The Lord continue to keep you safe and bless you with wave upon wave of grace and abundance.

20140101-154314.jpg

20140101-154323.jpg

20140101-154331.jpg

A Salad, A Quiche and A Dessert

Yet another holiday meal, this time with good friends. My contribution this round is just the salad, quiche and dessert.

20131228-232001.jpg
My salad style is more of an amalgam of favourite foods and whatever that is in season rather than a pre-mixed salad. I prefer to make my own dressings too. My basic go to dressing is a lemon, honey and mustard dressing. This time round, I am giving it a little twist by adding chickpea miso, shoyu and olive oil.

Basic Salad Dressing
Juice of 1 whole lemon
2-3 tablespoons of honey (adjust to taste)
1 tablespoon mustard grains or Dijon mustard

Whisk (not blend) everything together and you get a tangy and light dressing. Perfect especially if you have added heavier toppings in your salad like meats. If you prefer a smoother, velvety feel, add some olive oil. I use mustard grains to give the dressing some texture. But if you don’t like it, you can substitute with Dijon mustard.

Next up the quiche – mini mushroom and cheese quiche. I bought the mini tart casings as I didn’t have time to make from scratch. I just fried the button mushrooms and onions, added it into the casings with some grated Parmesan and poured in the egg, cream and milk mix and let it bake for about 20 minutes. The casings were pretty good I must say. I personally would have preferred a short crust pastry though.

20131230-063324.jpg

Last but not least, dessert. A maple walnut cake with maple cream cheese frosting which I adapted from a Martha Stewart recipe. This is a dense and heavy (in terms of weight and not the feel) due to the amount of maple syrup that goes in. But it is not cloyingly sweet mind you. Real maple syrup is not as sweet as those maple flavoured corn syrup. My hubby loves this cake. He calls it Ang Moh Huat Kueh (western maltose cake). Perfect pairing with his kopi (coffee).

20131230-064236.jpg

So there goes – a salad, a quiche and a dessert. My type of meal.

Christmas Feast

It’s always my passion to come up with food menus for the family every festive season.

This year, planning started about 2 months ago, first a skeleton, then fine tuning as the days went by.

I had 2.5h to whip up 2 appetisers plus its accompanying dips/sauce, salad, 2 sides, 1 main meat, 1 carb and dessert. Solo. In the end, I overran by 30minutes. Not too bad. Very blessed that hubby and in laws entertained the kids whilst I was slogging it out in the kitchen.

Appetisers
Grilled spiced prawns with a Peranakan inspired mango salsa

Smoked salmon rolls with a Greek yogurt with capers and spring onion dip

Salad
Butterhead lettuce with my favourite toppings in a homemade tahini dressing

Mains
Baked chicken rolls with chestnut and mushroom stuffing wrapped with bacon accompanied by Duchy’s organic apple and raisin chutney

Garlic butter herb rice (sorry, no pics taken for this one)

Sides
Roasted vegetable medley of eggplant, sweet potato, pumpkin and red onions

The other side vegetable was steamed broccoli and French beans tossed in butter, mainly for the younger kids who are less adventurous with spices.

Dessert
Warm molten lava chocolate cake with B&J ice cream
This has got to be my fav of all. First attempt at a lava cake and it turned out good. Got the recipe from Nigella Lawson. Molten lava chocolate cake

I reduced the sugar to 120g but still found it sweet. Maybe I should reduce further to 100g next time. I used 5 medium eggs and I upped the baking time to 20min cos it was no where near ready at 10min. I shall do 15min next time to get more lava in my cake.

Have a Blessed Christmas everyone. Enjoy the pics.

20131214-220357.jpg

20131214-220409.jpg

20131214-220421.jpg

20131214-220435.jpg

20131214-220457.jpg

20131214-220515.jpg

20131214-220526.jpg

20131214-220535.jpg