I have been contemplating for the past few hours how to name this cake. To call it a raspberry and chocolate cheesecake is not quite right. To call it a raspberry cheesecake with chocolate cake is possibly technically correct, but hardly a snazzy name.
I was inspired whilst combing Pinterest for some inspiration to make my love a birthday cake that is not the standard chocolate number. With a tight schedule at home and at work this week, I concocted something that wasn’t too difficult to make.
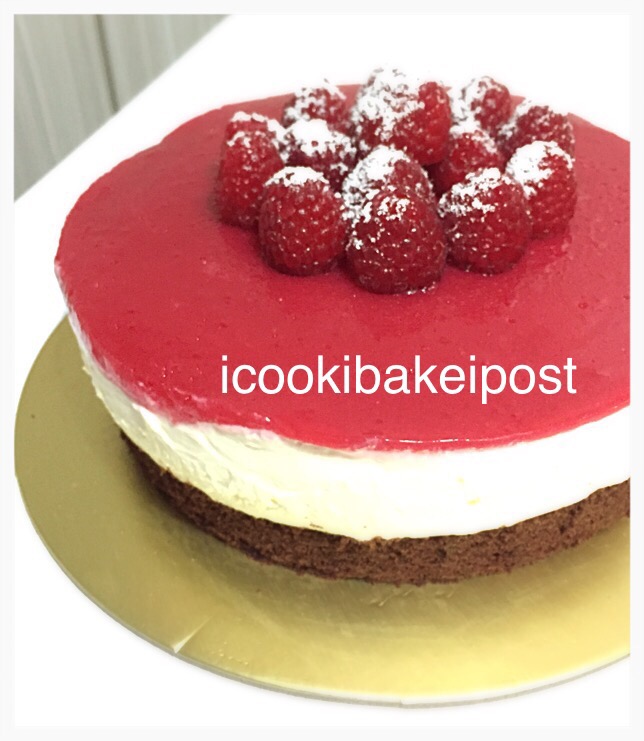
The end result is a beautiful layer of Varlhona chocolate sponge cake as my base, followed by a no bake lemony cheesecake (I tweaked the recipe slightly from a cherry cheesecake by Nigella. This is topped by a raspberry gelatin. I added some fresh raspberry finish the look and dusted some icing sugar on it. Icing sugar is to me like magic dust. Just a sprinkle of it will bring a blah looking cake to a chi-chi looking dessert.

Recipe
Chocolate sponge cake – any of your fav sponge will do. I got mine from a good friend and it is her specialty so I have been sworn into secrecy not to share the recipe. Sorry about that.
Cheesecake – from Nigella
Tweaks made – cream cheese was upped to about 400g. Cream reduced to about 120ml. Lemon juice was upped to the juice of 1 whole lemon. I basically wanted a lemony cheesecake that was still a tad dense but not overly dense. I reduced sugar to taste as well.
Raspberry gelatin
200g fresh raspberry
80-120g sifted icing sugar
2-3 teaspoons of gelatin powder
1/4 cup hot water
Purée the raspberry with the icing sugar in a blender. I added around 120g of sugar as my raspberries were really tart.
Once done, sieve it to separate the seeds and pulp. Pour half the purée into a saucepan and warm it through.
Add the gelatin powder into the hot water and stir quickly before adding the warm purée. Once mixed well, add the balance of the purée.
Assembly
I made a 7″ round chocolate sponge cake, about 1″ thick. Once cooled, I placed it on a cake base.
Using a 7″ round springform ring, I fenced it round the cake. This will be my “biscuit” base for the cheesecake.
After making the cheesecake mix, I poured it on top of the choc cake, making a smooth even finish with a spatula or the back of a warm spoon if you like. All this while, keep the ring on. Leave it in the fridge to chill for at least 3h or overnight.
Once the cheesecake has formed up, prepare the gelatin and pour it on top of the cheesecake. Leave to set in the fridge for at least 3 hours.
Once it is firm to the touch, it is time to remove the ring, something that I do with bated breath. It will be easier to use a thin plastic spatula to loosen the sides of the gelatin first before you actually open up the catch of the springform ring.
I topped my cake with fresh raspberry and dusting some icing sugar on it. Serve and enjoy!